Custom CSS
The Botpress webchat interface is fully customizable. You can change any of the styling using CSS. This can be done in two steps.
- Firstly create your own cascading style sheet and name it anything you want. Then, paste your stylesheet in the
<botpress_dir>/data/assets/modules/channel-webfolder. - Secondly, you need to reference your new style sheet to your integrated chatbot. You can easily do this by referencing your new stylesheet using the
extraStylesheetproperty.
Let us go through these steps in more detail.
Step 1 - Styling (CSS)
Paste the following CSS file in the <botpress_dir>/data/assets/modules/channel-web folder. Feel free to change the style here. The original Botpress theme can be found here.
.bpw-from-bot .bpw-chat-bubble {
  background-color: #ececec;
}

.bpw-chat-bubble:last-of-type {
  border-bottom-right-radius: 20px;
  border-bottom-left-radius: 20px;
}

.bpw-chat-bubble:first-of-type {
  border-top-left-radius: 20px;
  border-top-right-radius: 20px;
}

.bpw-from-user .bpw-chat-bubble:last-of-type {
  border-bottom-right-radius: 0px;
}

.bpw-from-bot .bpw-chat-bubble:last-of-type {
  border-bottom-left-radius: 0px;
}

.bpw-from-user .bpw-chat-bubble {
  background-color: #4278f3;
  color: #ffffff;
}

.bpw-date-container .bpw-small-line {
  border-bottom: none;
}

.bpw-date-container {
  font-weight: 700;
  font-size: 14px;
}

.bpw-header-container {
  background-color: #f8f8f8;
  border-bottom: none;
}

.bpw-bot-avatar img,
.bpw-bot-avatar svg {
  border: none;
  border-radius: 50%;
}

.bpw-composer {
  padding: 10px;
  background: none;
  border: none;
}

.bpw-composer textarea {
  background: #ececec;
  border-radius: 20px;
  font-size: 1.25rem;
  overflow: hidden;
}

.send-btn {
  position: absolute;
  right: 30px;
  bottom: 28px;
  border: none;
  border-radius: 5px;
  background: #fff;
  padding: 5px;
  font-size: 14px;
  font-weight: 500;
  cursor: pointer;
}

.send-btn:hover {
  background: #d8d8d8;
}
Step 2 - Loading CSS File
Now, we need to instruct Botpress to use this custom CSS file for theming the webchat. For this, place the following code snippet in the <botpress_dir>/data/global/hooks/after_bot_mount folder. In our case, we used 01_create_shortlink.js as the file name.
const chatOptions = {
  hideWidget: true,
  config: {
    enableReset: true,
    enableTranscriptDownload: true,
    extraStylesheet: "/assets/modules/channel-web/chat.css"
  }
}

const params = {
  m: "channel-web",
  v: "Fullscreen",
  options: JSON.stringify(chatOptions)
}

setTimeout(() => {
  try {
    bp.http.deleteShortLink(botId)
  } catch (e) {}

  // Chatbot will be available at $EXTERNAL_URL/s/$BOT_NAME
  bp.http.createShortLink(
    botId,
    `${process.EXTERNAL_URL}/lite/${botId}/`,
    params
  )
}, 500)
Feel free to change the webchat config there. The critical line to keep is the extraStylesheet property.
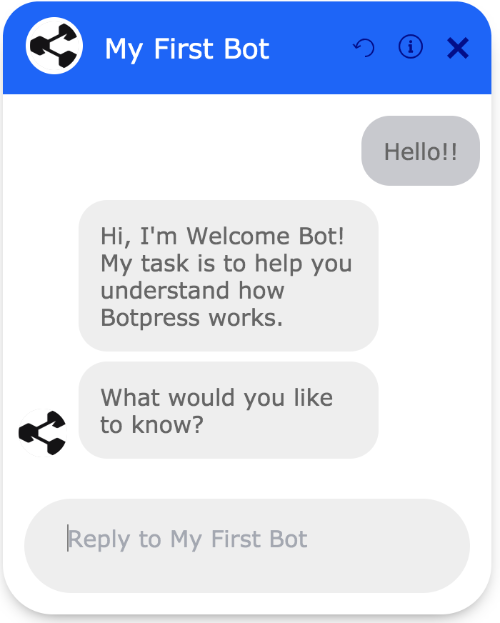
Result
Restart Botpress Server, and now your chatbot's default webchat will use your custom CSS theme!