Built-in Actions (All of Them)
Built-in Skills
Botpress comes preloaded with some rudimentary skills. Let us look at these; we are confident that you will use them when building your next chatbot!
Choice Skill
This skill is a spin-off from the realization that most chatbot conversations will eventually have a question with hardcoded choices as answers. Although a content element lets the user select buttons to pick a response, the choice skill adds a few more caveats to that content element, which we will explore here.
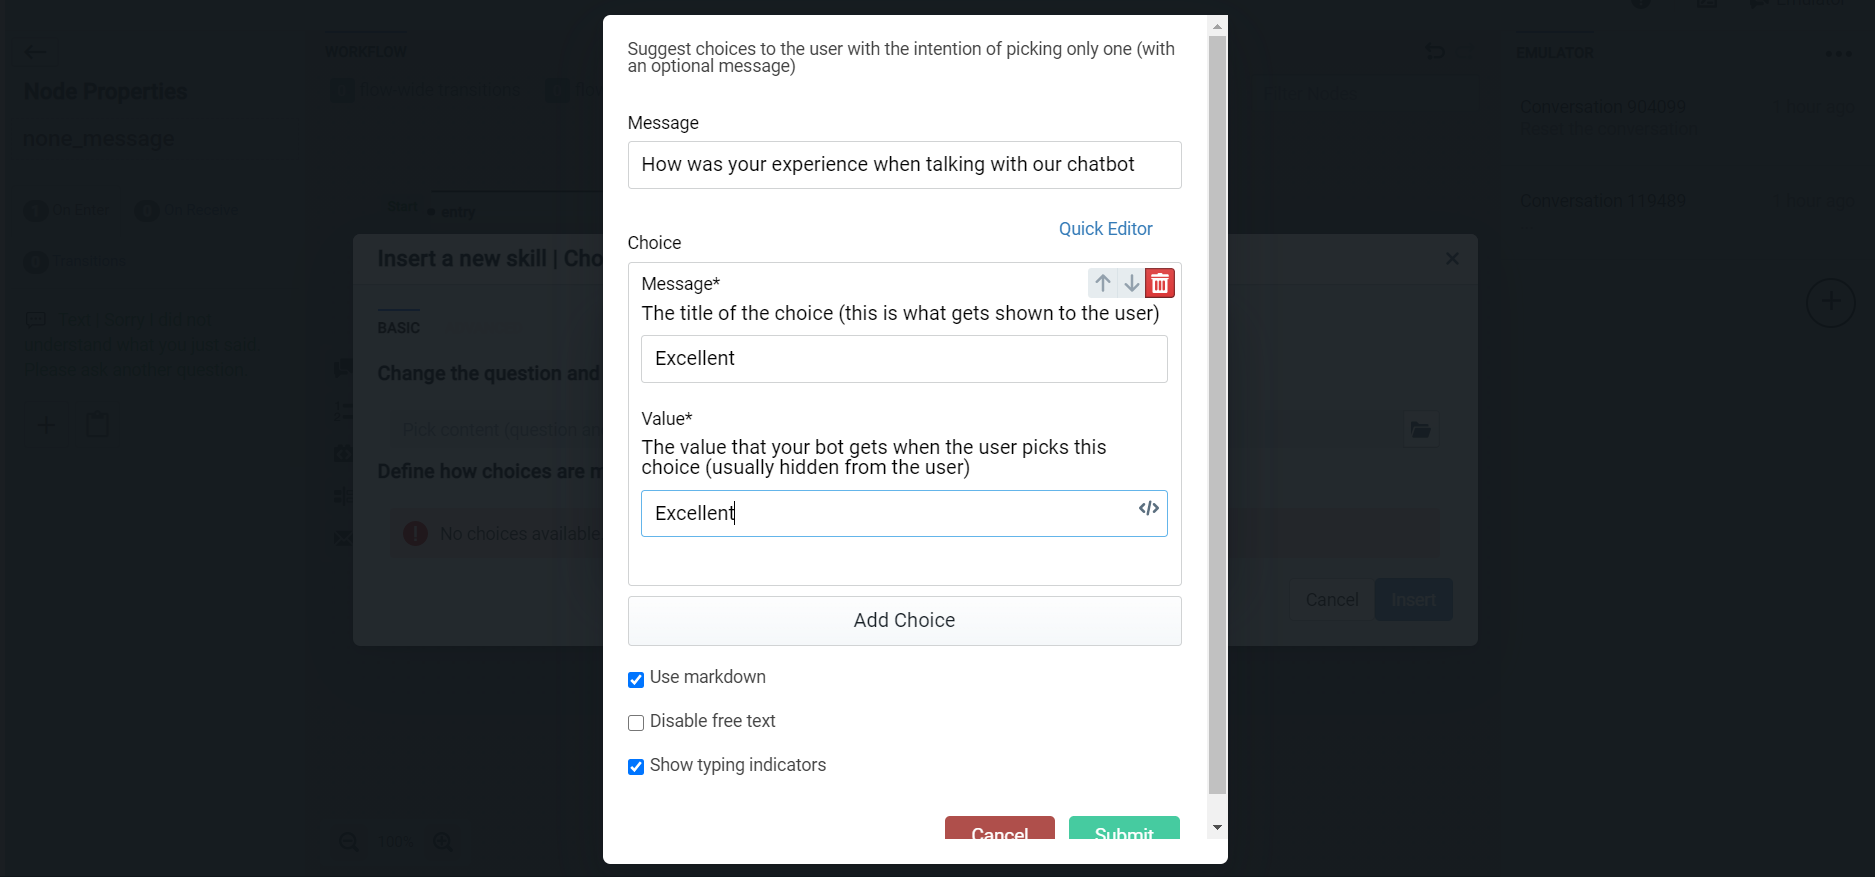
In addition to just letting you click a button and you are on your way, the choice skill adds a few checks and transitions to the process.
First of all, where freely typed responses are not disabled, the choice skill allows you to add answers which the user might type directly. In this way, the chatbot can understand and classify other responses besides the button click, adding a good measure of flexibility.
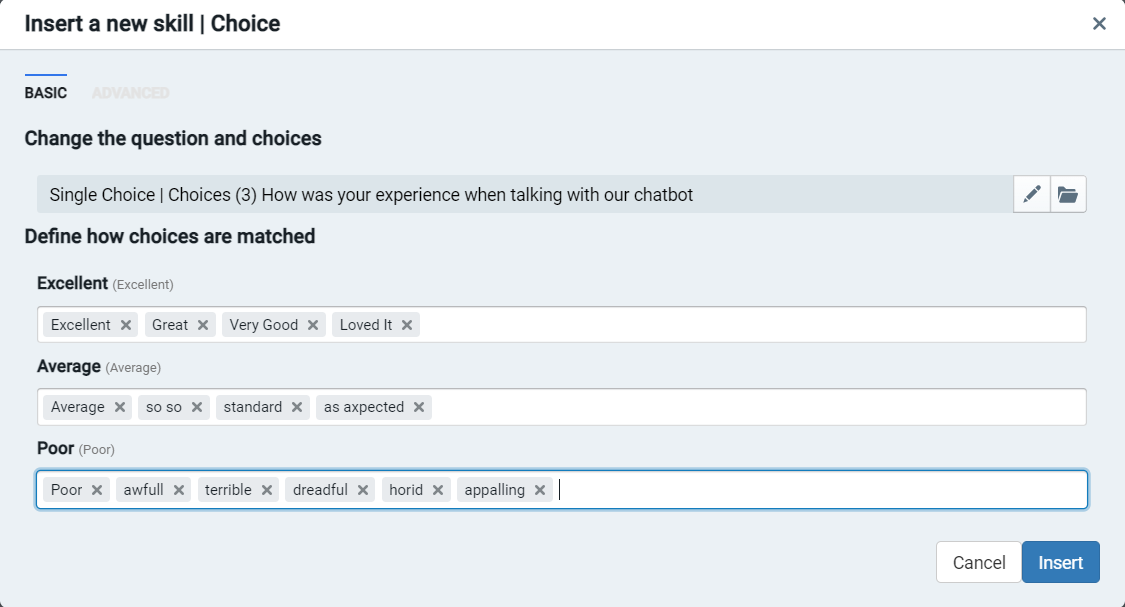
The choice skill also allows you to let the user have another go at answering the question asked. In instances where the user might fail to perceive that a button response is required, the chatbot prompts the user to choose from the supplied choices. It is also crucial in cases where the chatbot developer does not pre-empt the freely typed responses.
If the chatbot doesn't understand a user's answer, it will react by guiding the user on how to respond to the question before asking the question again.
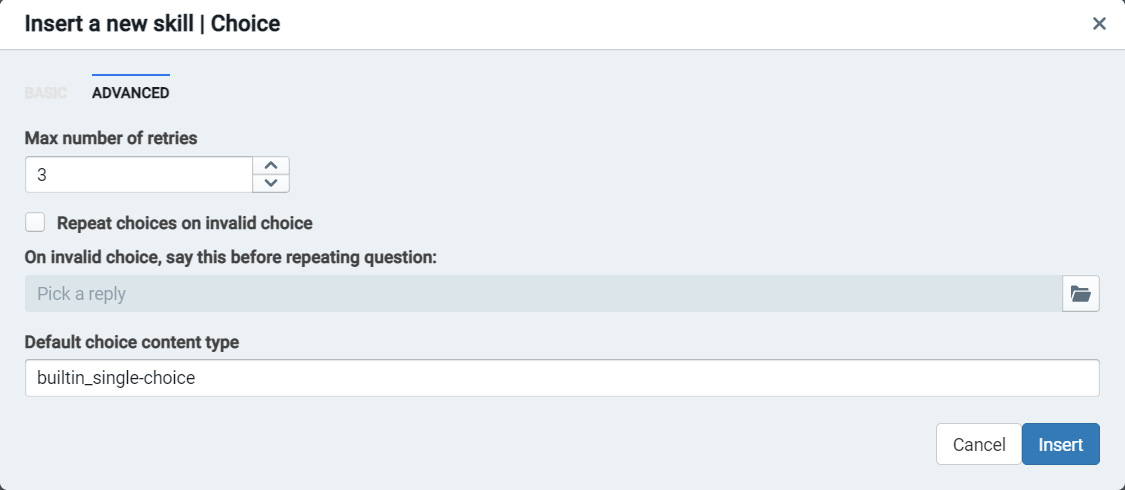
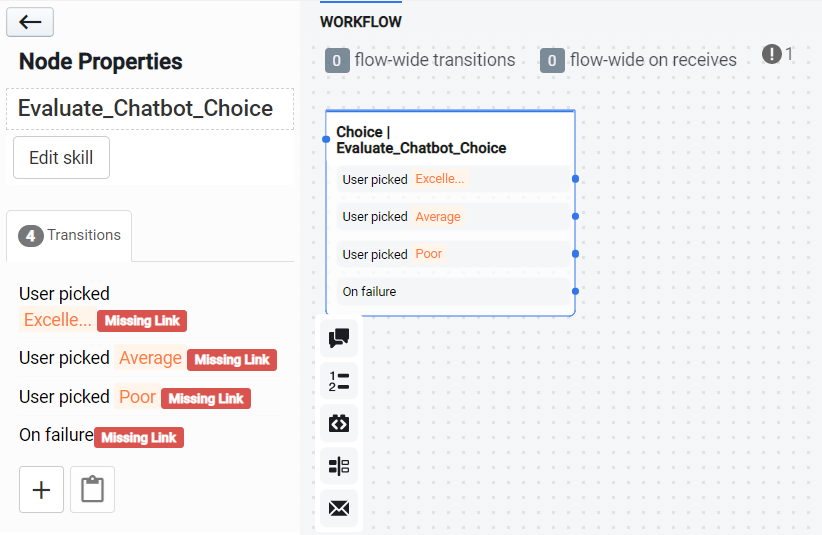
The choice skill also offers an option to transition to a different node when the user repeatedly fails to answer a question.
Email Skill
The email skill provides a quick way to send emails from within a Botpress workflow.
Configuring Email Skill
To send an email using the email skill, you need to configure your chatbot with a transport connection string. Set the configuration string in the directory ...data/global/config/basic-skills.json. For more information on the mail transporters available and how to configure them, please visit the Nodemailer documentation
Here is an example of a configuration using a mail server:
{
  "$schema": "../../assets/modules/basic-skills/config.schema.json",
  "defaultContentElement": "builtin_single-choice",
  "defaultContentRenderer": "#builtin_single-choice",
  "defaultMaxAttempts": 3,
  "disableIntegrityCheck": true,
  "matchNumbers": true,
  "matchNLU": true,
  "transportConnectionString": {
    "host": "192.168.100.200",
    "port": "25",
    "secure": false,
    "tls": {
      "rejectUnauthorized": false
    }
  }
}
note
Setting "rejectUnauthorized": false will prevent the Botpress server from rebooting every time an email fails to send. We recommend that you put in place a fall-back strategy if this happens using the on failure transition.
Creating your skill
From the Flow Editor view, click on Insert Skill > Send Email. The following interface allows you to insert the information you would fill in using any standard email service. From, To, CC & BCC These fields are filled with email addresses. The From field will be the sender's email address that the recipient will see when receiving an email from your chatbot. You can configure it to any valid email address. Subject This field contains the subject of the email. You will need to create a content element that will load as the subject line. Please note that it will render as plain text even if you use markdown in the subject line. Email Content Again; this field will load from a content element. Unlike the subject field, you can use markdown, which Botpress will render correctly to the receiver. You can also include HTML to enhance the formatting of your email body further.
It is worthy to note that Botpress supports templating in all fields of your email skill, allowing access to variables stored in Memory. All bot, user, session, temp, and event are accessible via templating. To access these variables, reference the memory location.
Other Skills
Two other skills, namely, the Call API and the Slot Skill are available in Botpress. You can look up these skills and use them in your chatbot.
In this tutorial, we're going to fetch the list of Botpress repositories on Github and display the description of the first one. We will show you how to call an API, save the response and use the answer in a content element through templating.
Action Example
We will use axios as an HTTP client.
Start by creating a new JavaScript file in /data/global/actions/callApi.js. Then copy the following code:
const axios = require('axios')

/**
 * @title Call the Github API to fetch Botpress repositories
 * @category Turorial
 * @author Botpress, Inc.
 **/
const callApi = async () => {
  // We call the Github API
  const { data } = await axios.get('https://api.github.com/orgs/botpress/repos')

  // We assign the response to the session variable so we can use it later
  session.response = data
}

// Actions are async, so make sure to return a promise
return callApi()
info
What is the session variable? Learn how to use Memory to store data.
Using the Action
Add an onEnter action instruction in your node and select the callApi action from the list:
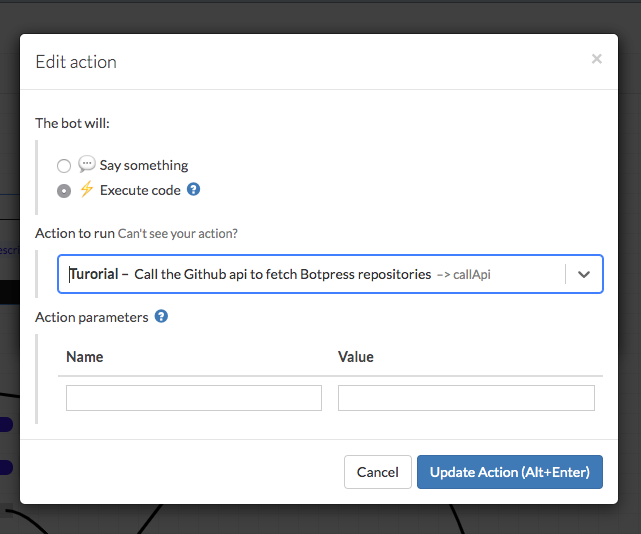
info
What are onEnter instructions? Understand how the node Lifecycle works.
Add a Text Content Element
Create another onEnter instruction to make your bot say something. Once the first instruction executes, the response is stored in the session variable.
Here we use templating to get the description of the first repository from the list:
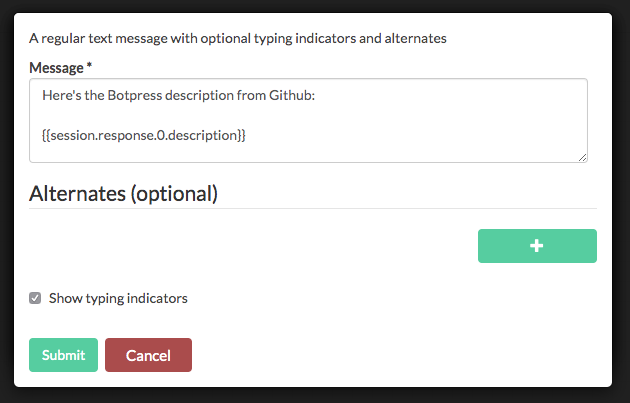
info
What is templating? Take a look at the Mustache demo to understand how templating works in Botpress.
Once everything is completed, this is what your node should look like:
